

React Native
React Native
A community for React Native developers to learn, build, and scale mobile applications.
Discuss:
• React Native fundamentals
• Expo & Native CLI
• Android & iOS development
• UI/UX design systems
• APIs & backend integration
• Firebase & Supabase
• AI integrations
• Performance optimization
• State management
• Authentication systems
• Real-world app architecture
• Debugging & deployment
Perfect for beginners, students, and advanced mobile engineers building production-ready apps.
Show more
May 18, 2026
Public
7
Members
1
Moderators
Chiluverichethankumar
1 month ago
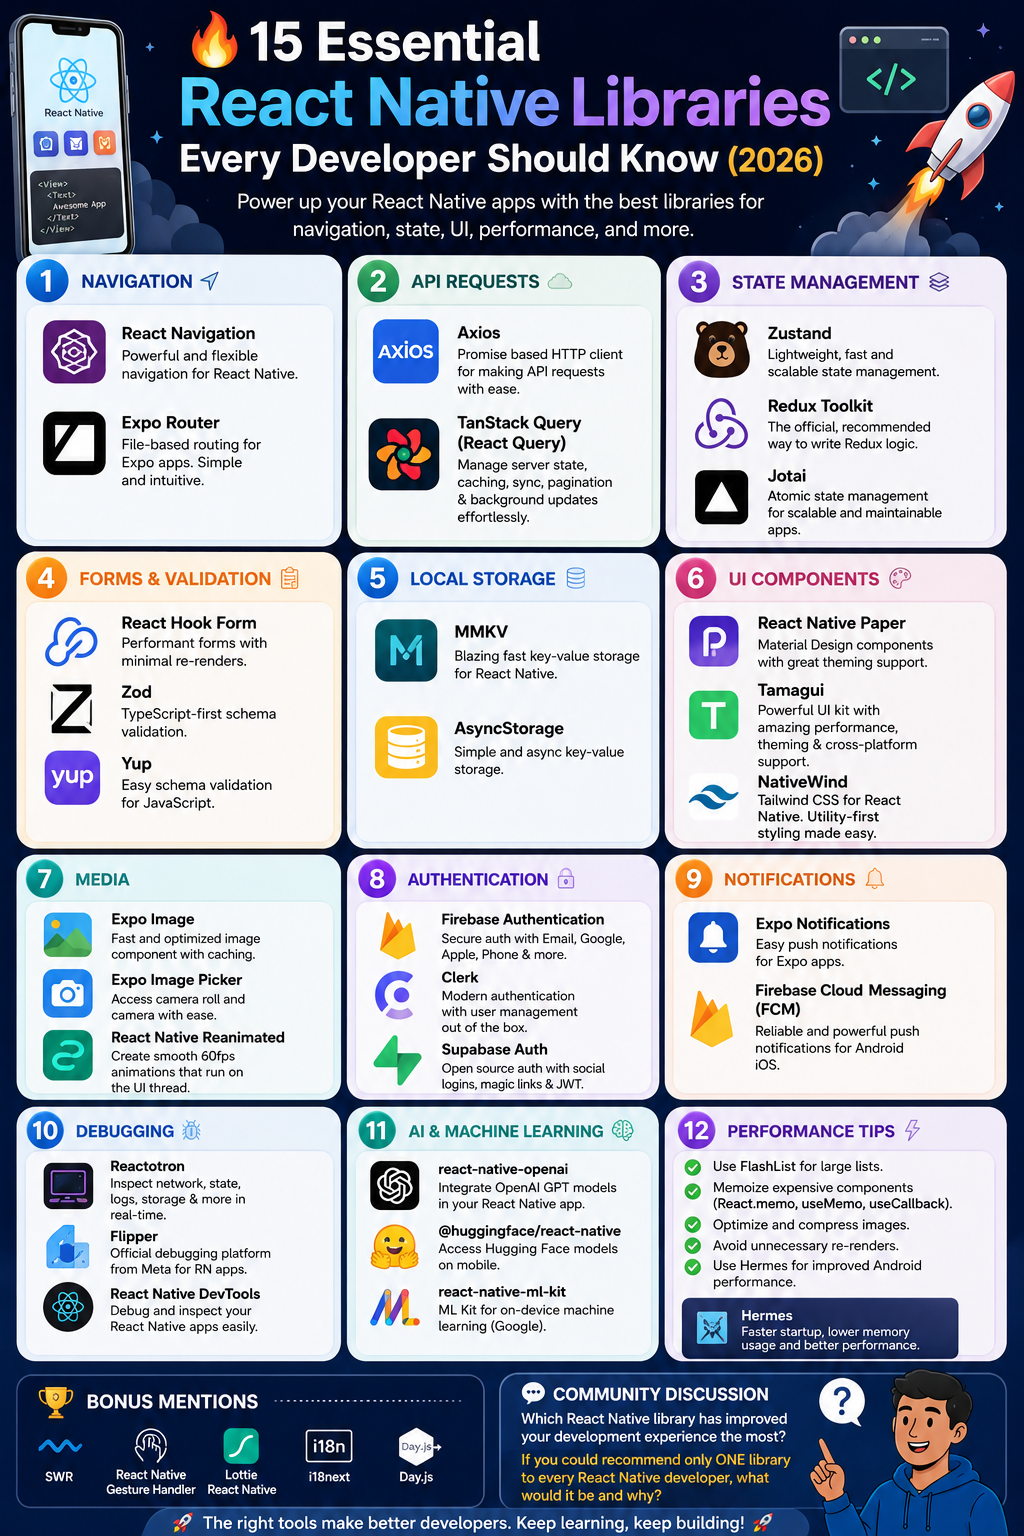
🔥 15 Essential React Native Libraries Every Developer Should Know (2026)
Whether you’re building a startup, an enterprise application, or a production-ready mobile app, these libraries can save hundreds of hours of development time while improving performance, maintainability, and developer experience.
📱 Navigation
• React Navigation
The most widely used navigation library for React Native. Supports Stack, Bottom Tabs, Drawer, Deep Linking, and more.
• Expo Router
File-based routing built on React Navigation. Makes navigation simpler, especially for Expo projects.
🌐 API Requests
• Axios
A powerful HTTP client for handling REST APIs, interceptors, authentication headers, uploads, downloads, and request cancellation.
• TanStack Query (React Query)
One of the best libraries for managing server state.
Why use it?
- ✅ Automatic caching
- ✅ Background data refetching
- ✅ Optimistic UI updates
- ✅ Pagination & infinite scrolling
- ✅ Automatic retries
- ✅ Loading and error state management
- ✅ Reduces unnecessary API calls
- ✅ Keeps app data synchronized automatically
Perfect for apps that frequently communicate with backend APIs.
🗂 State Management
• Zustand
A lightweight, simple, and fast global state management library with minimal boilerplate.
• Redux Toolkit
Ideal for large-scale applications requiring predictable and centralized state management.
• Jotai
An atomic state management library that keeps global state simple and highly performant.
📋 Forms & Validation
• React Hook Form
Build performant forms with minimal re-renders.
• Zod
TypeScript-first schema validation for safer and cleaner code.
• Yup
Popular schema validation library used with many form solutions.
💾 Local Storage
• MMKV
Ultra-fast encrypted local storage with significantly better performance than AsyncStorage.
• AsyncStorage
Simple key-value storage for lightweight app data and preferences.
🎨 UI Components
• React Native Paper
Material Design components with excellent accessibility and theming support.
• Tamagui
A modern UI kit and styling system designed for high-performance React Native and React applications.
Why use Tamagui?
- ✅ Beautiful pre-built components
- ✅ Excellent TypeScript support
- ✅ Cross-platform (iOS, Android & Web)
- ✅ Fast rendering and optimized performance
- ✅ Powerful theming system
- ✅ Responsive design support
- ✅ Consistent design system
- ✅ Reduces the need to build UI components from scratch
Perfect for building premium, scalable, production-ready applications.
• NativeWind
Tailwind CSS styling for React Native, allowing utility-first development with cleaner UI code.
📸 Media
• Expo Image
Fast, optimized image component with caching and improved performance.
• Expo Image Picker
Access the device camera and photo gallery with a simple API.
• React Native Reanimated
Create smooth, high-performance animations that run on the UI thread.
🔐 Authentication
• Firebase Authentication
Quick and secure authentication with Email, Google, Apple, Phone, and more.
• Clerk
Modern authentication platform with complete user management.
• Supabase Auth
Open-source authentication with social logins, email/password, magic links, and JWT support.
🔔 Notifications
• Expo Notifications
Simple push notification support for Expo applications.
• Firebase Cloud Messaging (FCM)
Reliable push notifications for Android and iOS with advanced messaging capabilities.
📊 Debugging
• Reactotron
Inspect API requests, Redux/Zustand state, AsyncStorage/MMKV, logs, and app performance in real time.
• Flipper
Official React Native debugging platform for inspecting layouts, network traffic, databases, and performance.
• React Native DevTools
Built-in debugging tools for inspecting components, hooks, and application performance.
🚀 Performance Tips
✅ Use FlashList for large datasets.
✅ Memoize expensive components with React.memo().
✅ Use useMemo() and useCallback() appropriately.
✅ Optimize and cache images.
✅ Enable Hermes for faster startup and lower memory usage.
✅ Lazy load screens when possible.
✅ Avoid unnecessary re-renders.
💬 Community Discussion
Which React Native library has improved your development experience the most?
If you could recommend only ONE library to every React Native developer, what would it be and why?
Let’s help the community discover the tools that make React Native development faster, cleaner, and more enjoyable. 🚀
Chiluverichethankumar
1 month ago
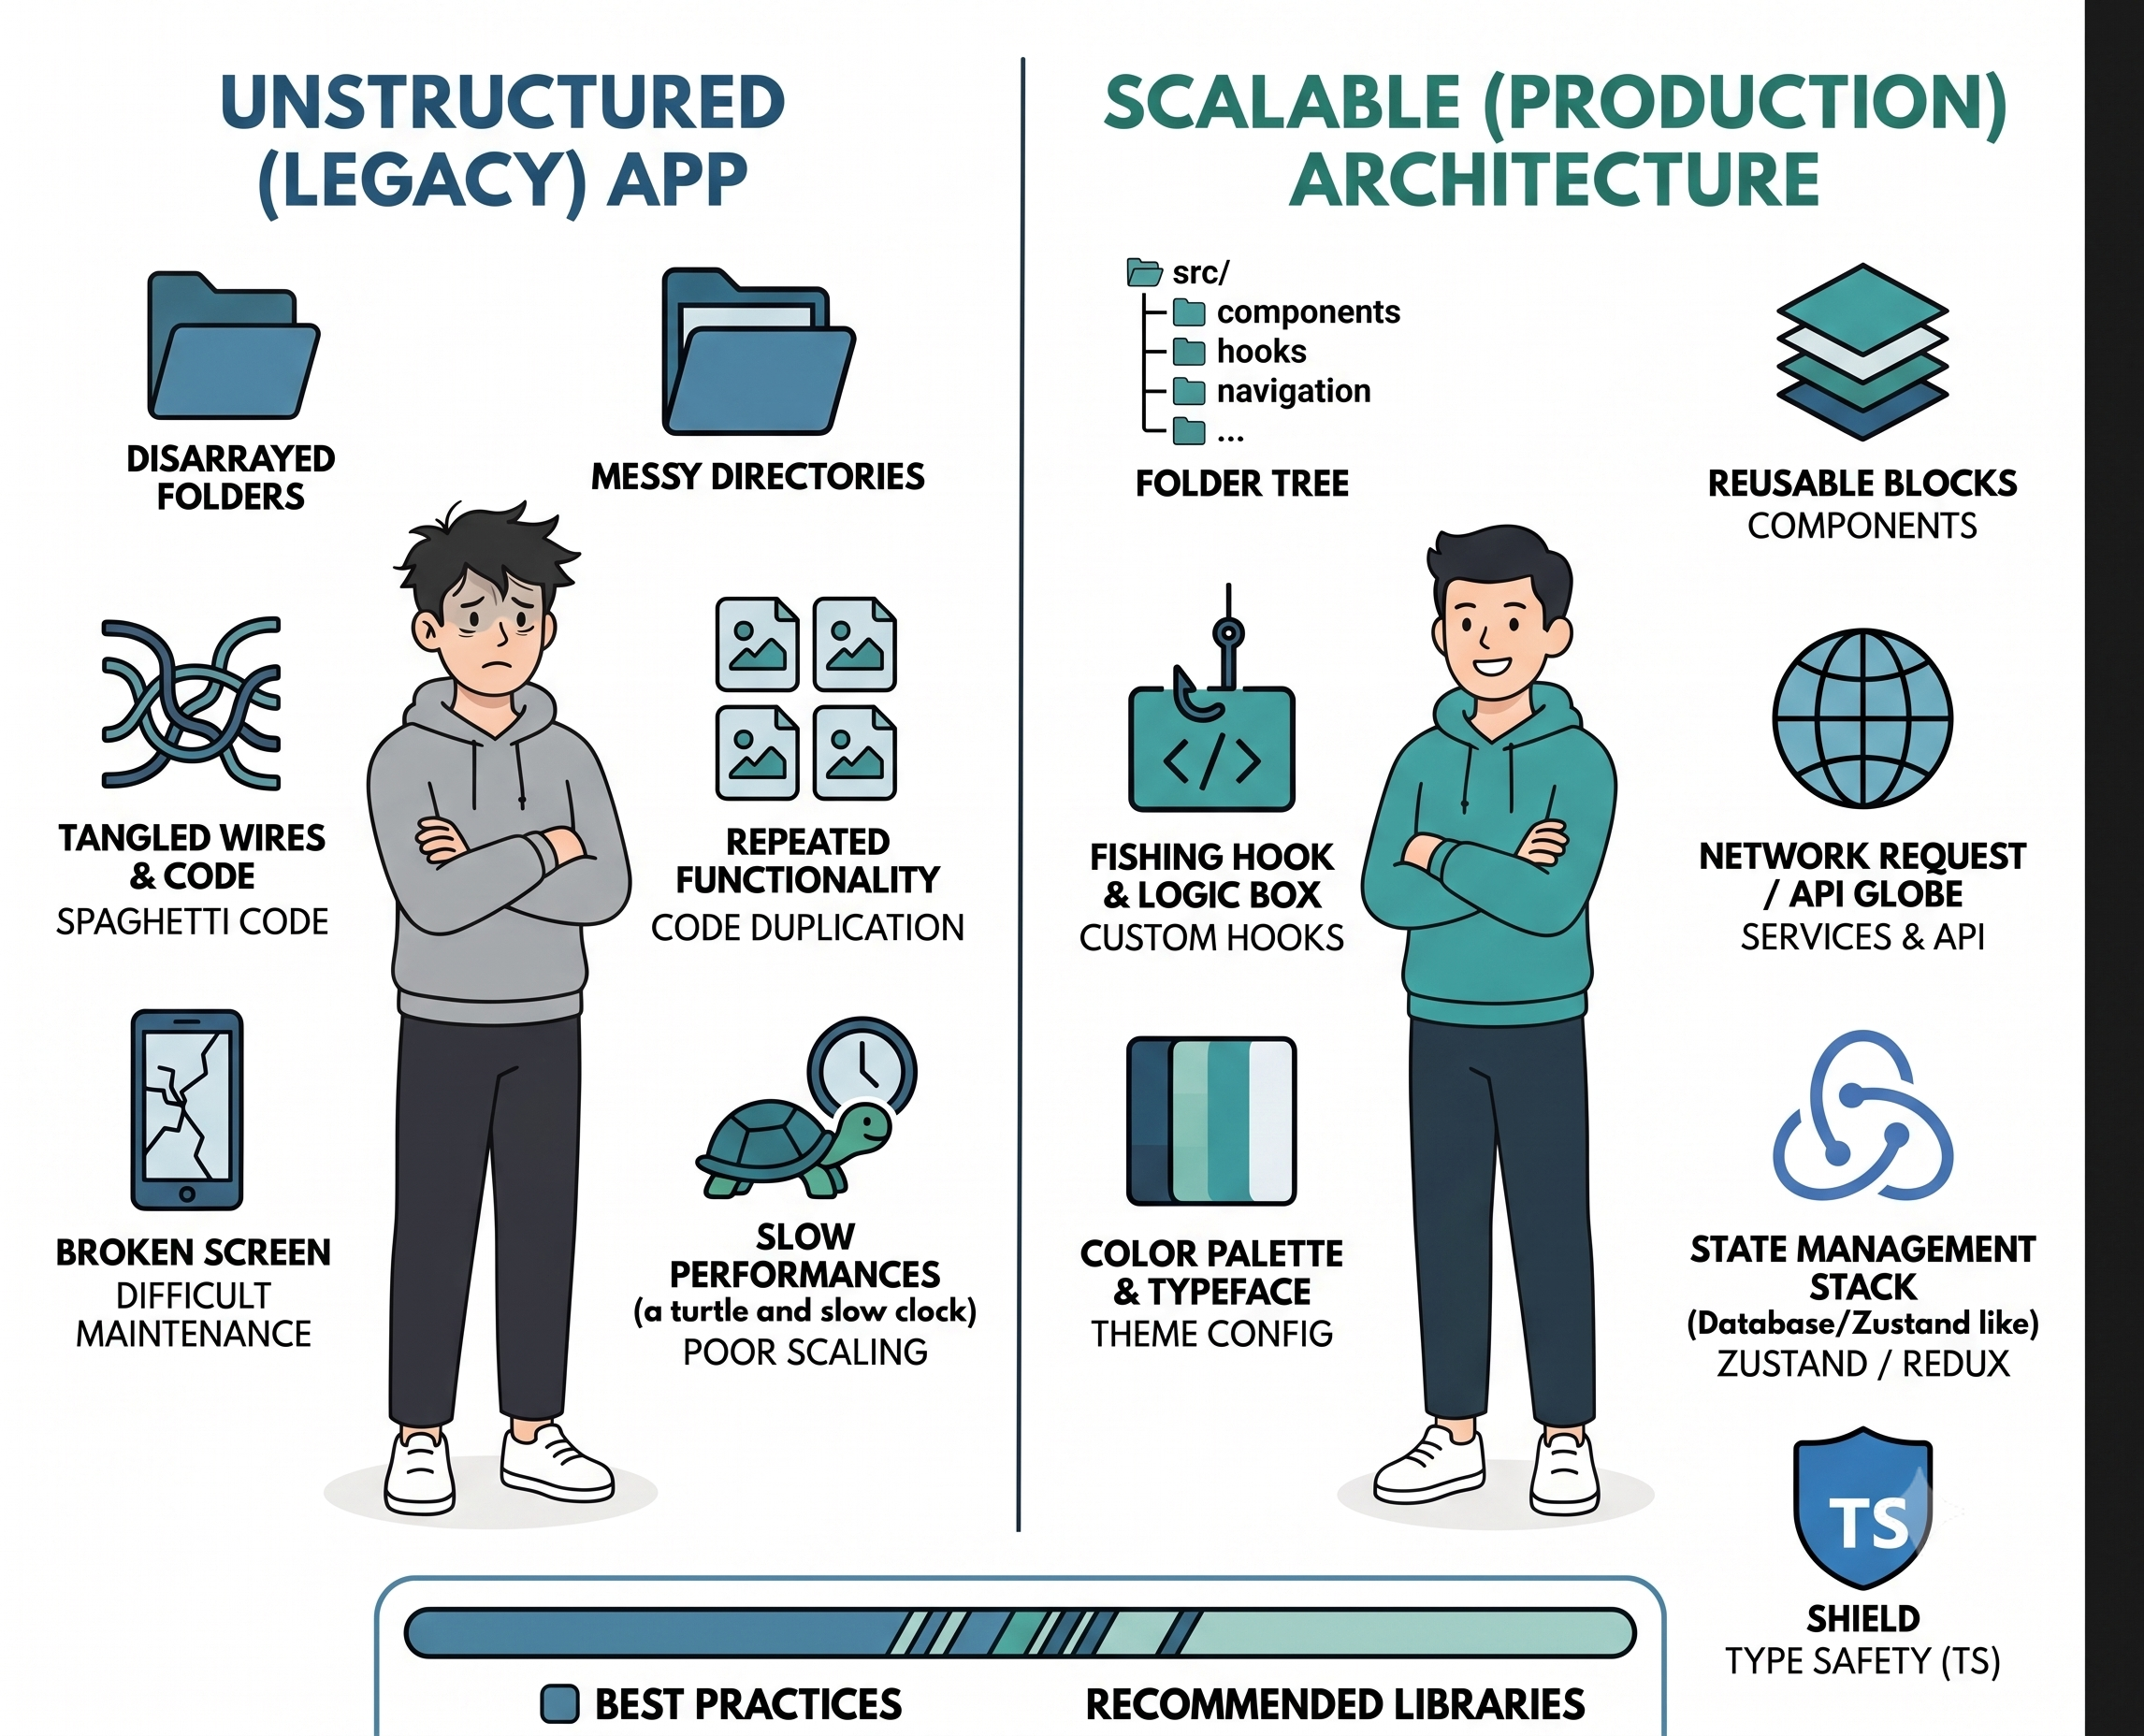
📁 React Native Project Structure That Scales (2026)
As your React Native app grows, having a clean project structure becomes just as important as writing good code.
A well-organized architecture makes your app easier to maintain, debug, and scale with a team.
Here’s a production-ready structure that works well for most projects:
src/
├── assets/
├── components/
├── hooks/
├── navigation/
├── modules/
├── screens/
├── services/
├── api/
├── utils/
├── constants/
├── theme/
├── types/
├── store/
└── context/
✅ Best Practices
• Keep UI components reusable.
• Separate business logic from UI.
• Create custom hooks for reusable functionality.
• Store API calls in a dedicated services/api folder.
• Use TypeScript for better type safety.
• Centralize colors, spacing, and typography in a theme folder.
• Avoid duplicate code by creating shared components.
• Organize features into modules instead of placing everything inside screens.
Recommended Libraries
🚀 Expo or React Native CLI
🧭 Expo Router / React Navigation
🌐 Axios or React Query
📦 Zustand / Redux Toolkit
🗄️ MMKV or AsyncStorage
🎨 NativeWind / React Native Paper / Tamagui
📋 React Hook Form + Zod
Discussion 💬
How do you organize your React Native projects?
Share your folder structure, GitHub repository, or architecture ideas below. Let’s learn from each other!
Chiluverichethankumar
1 month ago
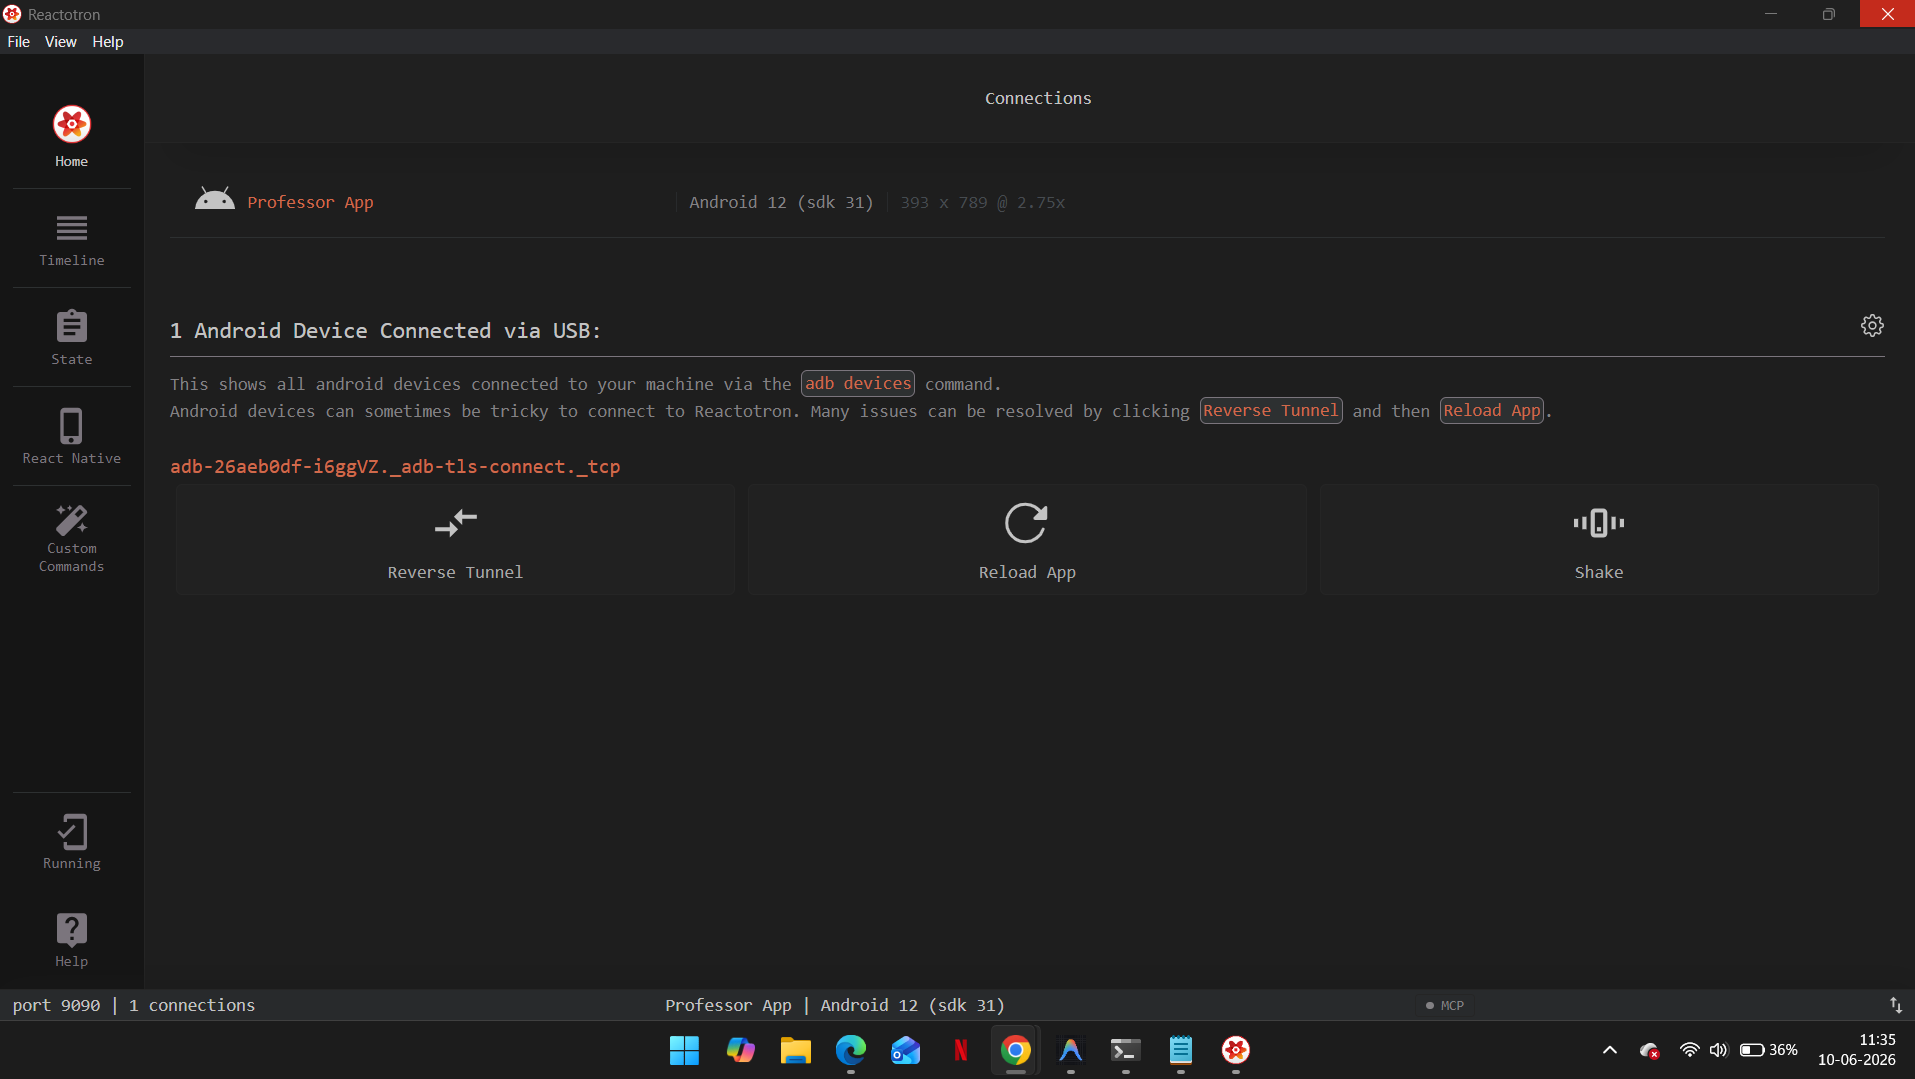
Reactotron
Reactotron
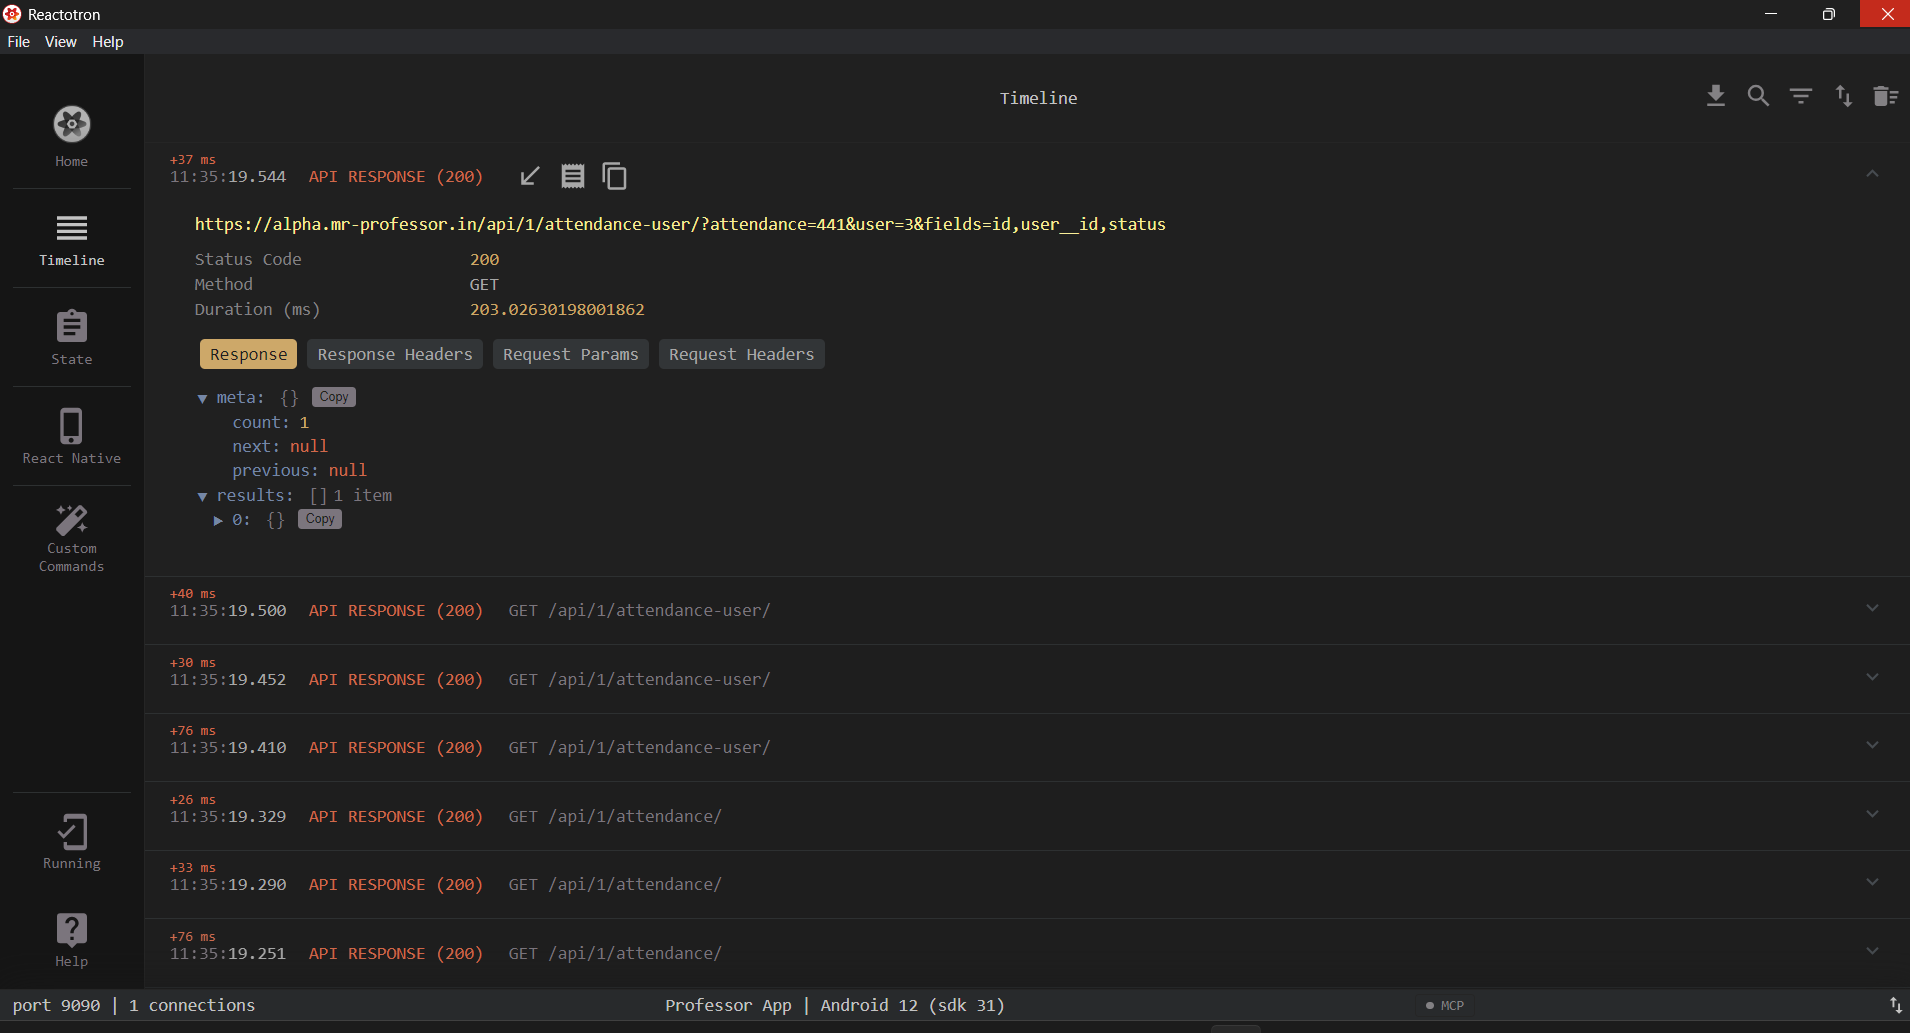
- Reactotron is a popular, free desktop application developed by Infinite Red used for inspecting, debugging, and monitoring React JS and React Native applications.
- It works by plugging into your project as a development dependency, allowing you to track your app’s runtime behavior in real-time without bloating your production build.
Key Capabilities
- State Management: Real-time inspection and hot-swapping of your application state, particularly with Redux and MobX-State-Tree.
- Network Inspection: Monitors and displays all API requests and responses (e.g., using apisauce) as they happen.
- Enhanced Logging: Functions as a supercharged console.log with support for custom messages, filters, and global error tracking with source-mapped stack traces.
- Device-Specific Tools: Tracks local databases (AsyncStorage and MMKV), tests performance benchmarks, and lets you drop visual design mockups on top of your app (Image Overlays) for pixel-perfect UI alignment.
- Custom Commands: Allows you to define custom actions in your mobile app that can be triggered directly from the Reactotron desktop UI (e.g., force-navigating to a specific screen, or toggling user login states).
Why Developers Use It
Unlike traditional web-based debuggers (like Chrome DevTools), Reactotron operates natively within your app's actual runtime environment, preventing interruptions to your development workflow.For tips on getting set up and understanding the dashboard timelinefor more info Reactotron
Chiluverichethankumar
2 months ago
Chapter 1: Create your first app
In this chapter, learn how to create a new Expo project.
Initialize a new Expo app
We’ll use create-expo-app to initialize a new Expo app. It is a command-line tool to create a new React Native project. Run the following command in your terminal:
> Terminal
> npx create-expo-app@latest StickerSmash
> cd StickerSmash
This command will create a new project directory named StickerSmash, using the default template. This template has essential boilerplate code and libraries needed to build our app, including Expo Router. We’ll continue to add more libraries throughout this tutorial as needed.
Benefits of using the default template
- Creates a new React Native project with expo package installed
- Includes recommended tools such as Expo CLI
- Includes a tab navigator from Expo Router to provide a basic navigation system
- Automatically configured to run a project on multiple platforms: Android, iOS, and web
- TypeScript configured by default
Run the app on mobile and web
In the project directory, run the following command to start the development server from the terminal:
Terminal
> npx expo start
After running the above command:
- The development server will start, and you’ll see a QR code inside the terminal window.
- Scan that QR code to open the app on the device. On Android, use the Expo Go > Scan QR code option. On iOS, use the default camera app.
- To run the web app, press w in the terminal. It will open the web app in the default web browser.
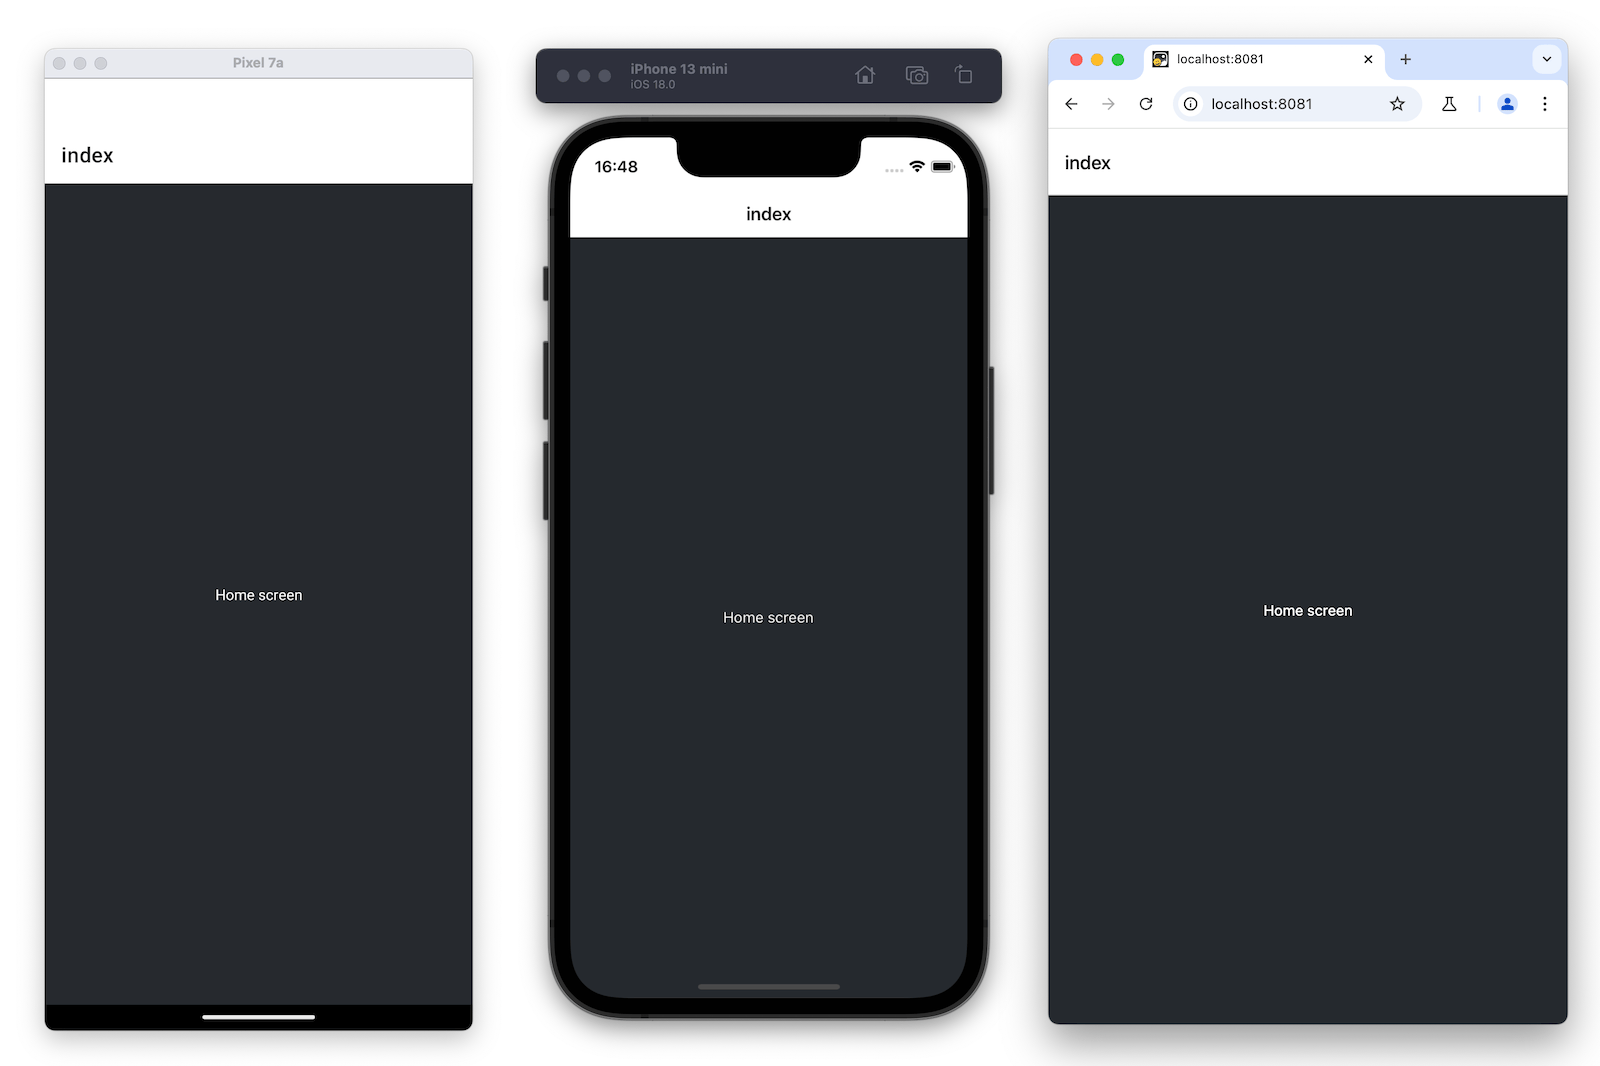
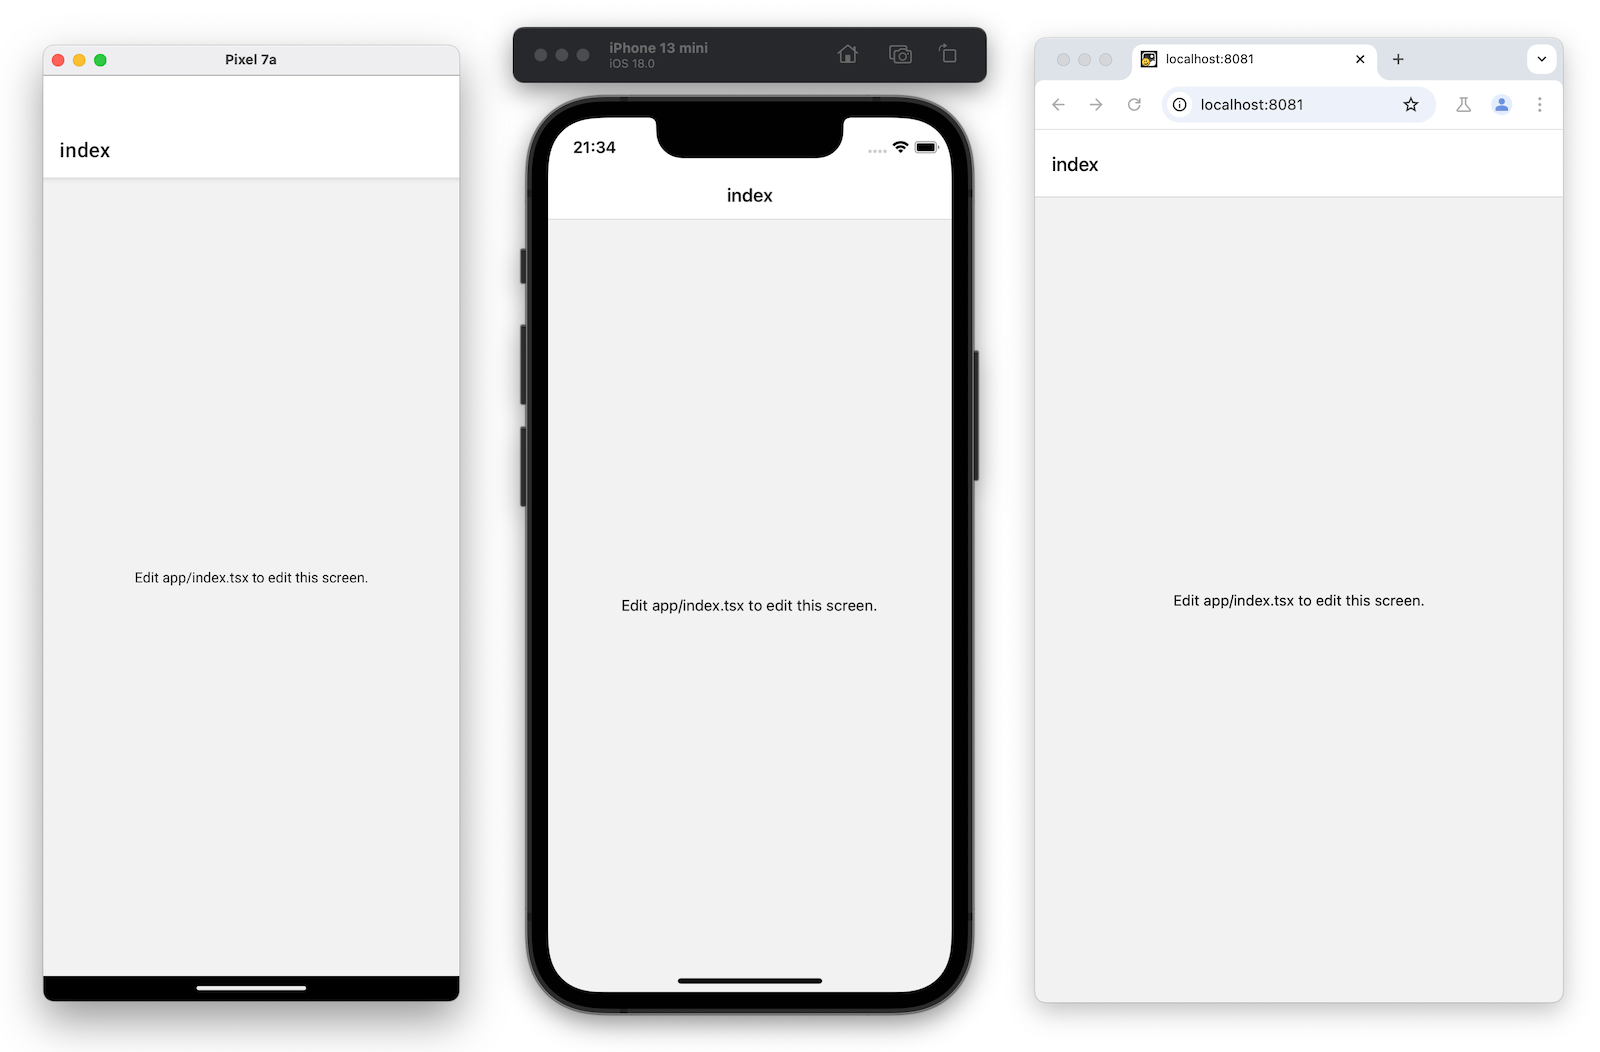
Once it is running on all platforms, the app should look like this:
Edit the index screen
The app/index.tsx file defines the text displayed on the app’s screen. It is the entry point of our app and executes when the development server starts. It uses core React Native components such as and to display background and text.
Styles applied to these components use JavaScript objects rather than CSS, which is used on web. However, a lot of the properties will look familiar if you’ve previously used CSS on web. Most React Native components accept a style prop that accepts a JavaScript object as its value. For more details, see Styling in React Native.
Let's modify app/index.tsx screen:-
Import StyleSheet from react-native and create a styles object to define our custom styles.
-
Add a styles.container.backgroundColor property to with the value of #25292e. This changes the background color.
-
Replace the default value of with “Home screen”.
-
Add a styles.text.color property to with the value of #fff (white) to change the text color.
imp
ort { Text, View, StyleSheet } from 'react-native'; export default function Index() { return ( Home screen ); } const styles = StyleSheet.create({ container: { flex: 1, backgroundColor: '#25292e', alignItems: 'center', justifyContent: 'center', }, text: { color: '#fff', }, });
> React Native uses the same color format as the web. It supports hex triplets (this is what #fff is), rgba, hsl, and named colors, such as red, green, blue, peru, and papayawhip. For more information, see Colors in React Native.
Summary
> > Chapter 1: Create your first app > > > > We’ve successfully created a new Expo project, used React Native core components, and are ready to develop our StickerSmash app. > > > > >
Chiluverichethankumar
2 months ago
What React Native app are you building?
Share your current React Native project 👇
What are you building? • Startup app? • AI app? • E-commerce? • Learning app? • Social platform? • UI practice?
Drop screenshots, ideas, or GitHub links 🚀
Chiluverichethankumar
2 months ago
Welcome React Native Developers 🚀
Welcome to the React Native community!
This space is for: • Learning React Native • Building mobile apps • Sharing UI designs • Solving bugs together • Discussing Expo & Native CLI • AI integrations • Backend APIs • Firebase & Supabase • Performance optimization
Whether you are a beginner or advanced developer, feel free to: • Ask questions • Share projects • Post app screenshots • Discuss ideas • Help other developers
Let’s build amazing mobile apps together 🚀